Teamleader Credentials for Backup TL
Backup Teamleader needs a Client ID and a Client Secret to start authorization with Teamleader. The application shows this window when it cannot yet verify access.
sequenceDiagram
    participant U as User
    participant A as Backup Teamleader
    participant N as Browser
    participant T as Teamleader
    U->>A: Enter Client ID and Client Secret
    U->>A: Click Verify
    A->>N: Opens authorization window
    N->>T: Requests integration permissions
    T-->>N: Authorization granted
    N-->>A: Local return to port 5000 (/callback)
    A-->>U: Access confirmation
Prepare the integration
- Open the Teamleader integrations portal. This is the same destination that Backup Teamleader's open API data button opens.
- Open the integration you will use for the backup or create one following the official OAuth 2 documentation.
- Get the Client ID and Client Secret from that integration's settings.
- Review the redirect URI and permissions before copying credentials to Backup Teamleader.
Redirect URI
Teamleader requires the redirect_uri to exactly match an authorized URI in the integration settings. The repository does not determine whether the published integration registered localhost, 127.0.0.1 or another hostname. Copy and keep the exact URI shown in the existing integration; do not interchange those hostnames even if they point to the same machine.
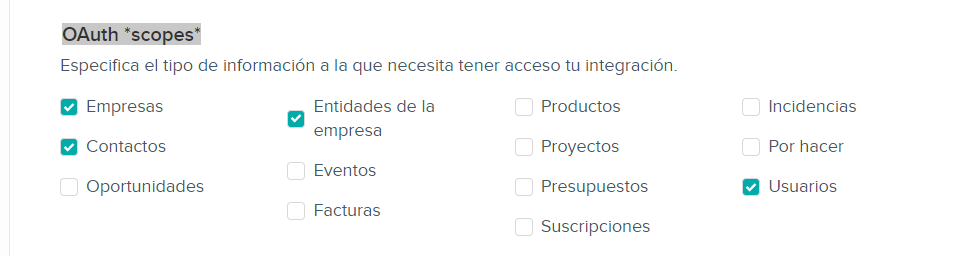
Permissions and scopes
Teamleader assigns scopes by endpoint family. Enable only those needed for the entities this installation must back up. The official documentation confirms, for example, the users, deals, projects and invoices scopes for their respective endpoints.
Authorize Backup Teamleader
- Enter Client ID.
- Enter Client Secret. The field hides the value by default.
- Click Verify.
- Complete authorization in the browser window the application opens.
- Keep Backup Teamleader open while waiting for the local return to
/callback. - Wait for the confirmation or pending verification message.
Do not expose the secret
Do not send the Client Secret by email, chat or screenshots. Do not publish config.ini or logs that may contain authorization data.
Checklist
- Client ID and Client Secret come from the correct integration.
- The registered URI is compatible with the local listener on port
5000and path/callback. - The integration has the scopes for all entities that will be backed up.
- Both fields are complete before clicking Verify.
- The application has continued with authorization or shown the pending verification detail.
- No real values have been shared in screenshots or issues.
Next step
Return to the first backup guide and prepare the destination folder.
Enviar incidencia